In
today’s post, I’m going to show you how to connect Stripe with your payment
form in a WordPress site?
Trust
me; you can do it within 2 minutes.
Let’s see how?
How to Connect with Stripe Addon with WPForms
What is Stripe?
Stripe is a leading online payment solution that allows people to send and receive money online. It integrates seamlessly with the most popular mobile wallets across the world, making transactions even more convenient for users.
Stripe is a perfect solution for all types of business, whether it is a small or a large eCommerce business.
WPForms Stripe Addon is a payment gateway plugin lets you connect your WordPress website with Stripe to receive funds, online orders and donations.
In other words, WPForms Stripe Addon make online transaction super easy.
How to Connect Stripe to Your WordPress Site Step-by-Step
Connecting Stripe to Your WordPress Site
Before we start, make sure you have already installed the WPForms on your site. After then, go ahead and install and activate Stripe addon.
Compatibility is key, so make sure you have everything you need in place. People usually visit this site for WordPress design agency before setting up WPForms because it’s always good to have an expert opinion. This way you don’t lose any data.
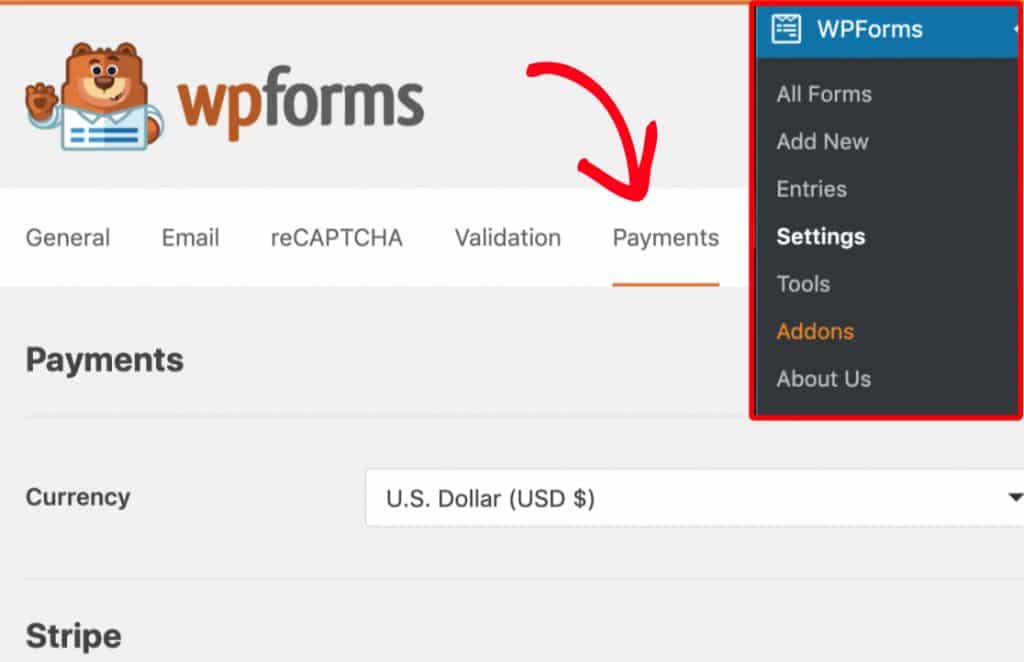
After installation and activation the Stripe Addon, head over to the WPFroms –> Settings where you will see the Payment tab, click on that.
You have to set currency types from currency dropdown before moving forward.
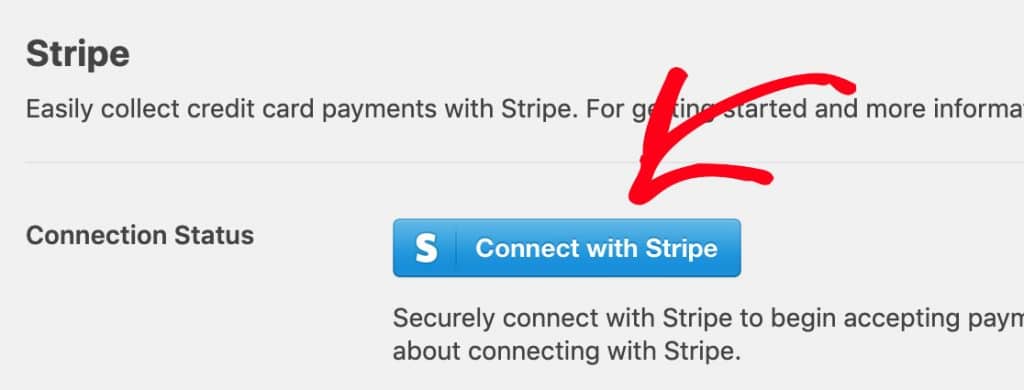
After currency selection, scroll down to the Stripe section, there you will see a field name Connection Status. From there you will have to click on the blue Connect with Stripe button.
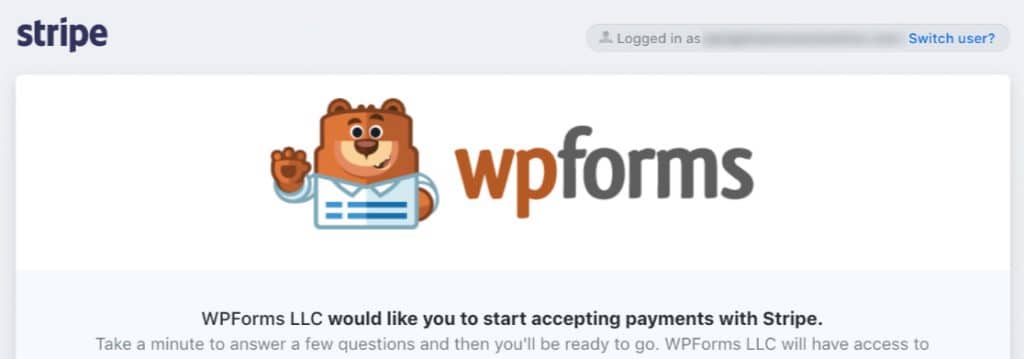
Next, you’ll have to authorize the connection between your forms and Stripe. You might see the different message if you already have activated your Stripe account.
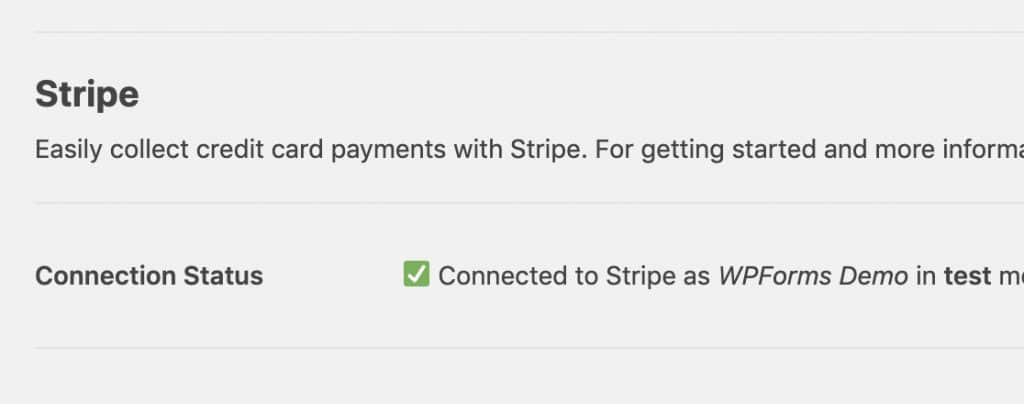
After the authorization process, you will be redirected to your admin area and will see that WPForms and Stripe is connected successfully.
Adding Stripe to Your Forms
After connecting to Stripe with WPforms now, you are eligible to add Stripe payments to your forms.
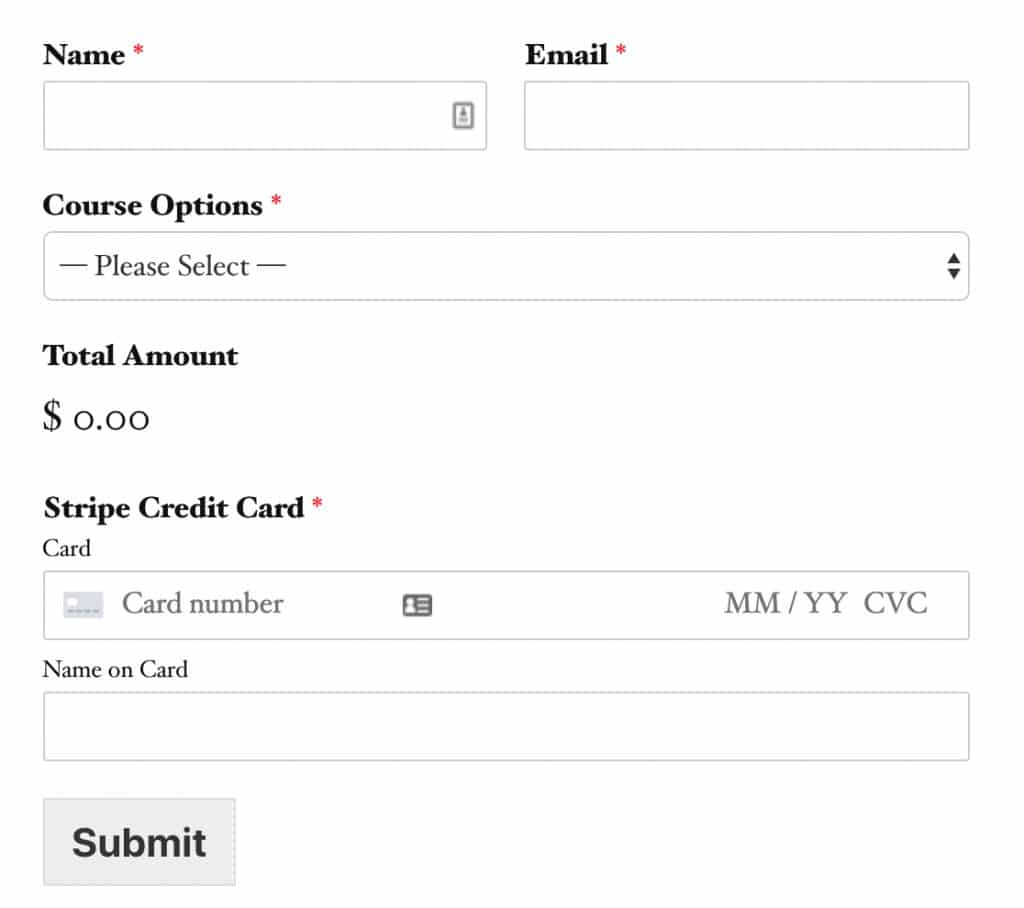
To start receiving payments first, you need to create a new form or edit an existing one.
You must have at least two fields in your forms to work with Stripe:
An items field (Single Item, Multiple Items, Checkbox Items, or Dropdown Items)
A Stripe Credit Card field
Let’s create a simple order form that contains fields Name, Email, Dropdown Items, and a Stripe Credit Card. You may add or remove fields from your forms according to your requirement.
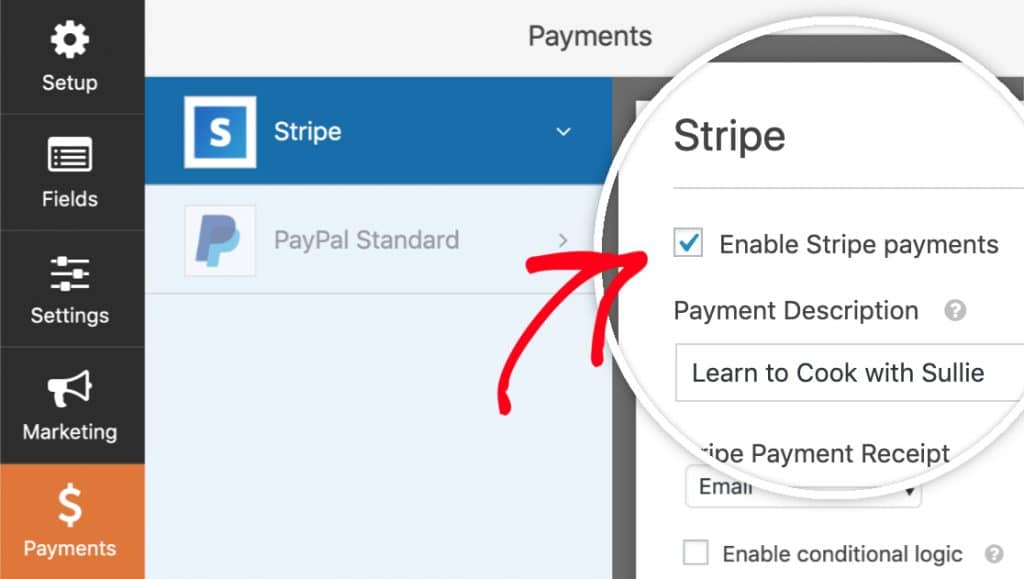
You need to enable stripe payments from stripe panel after adding the fields to the form builder. Go to the Payment >>Stripe, and from the Stripe panel, check the Enable Stripe payments.
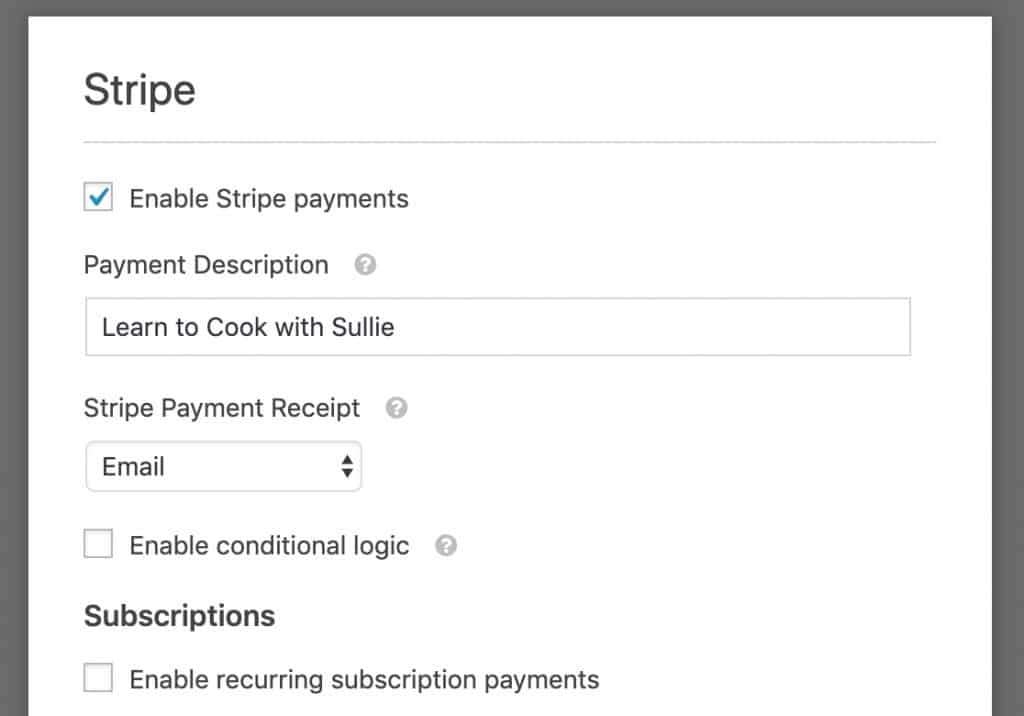
Once you enable Stripe payment, you will have to enter a short payment description that will show on user’s credit card statement. You need to select the email field under payment section to send a receipt.
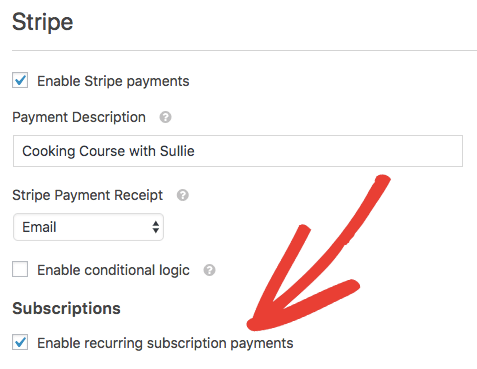
The form is ready for a onetime payment, but if you want to set up for recurring payment, then you need to do some additional settings.
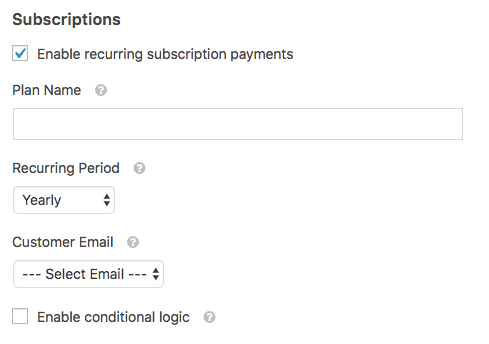
Setting recurring/subscription payment is simple, and you can do that from the same setting panel. All you have to do is click on the checkbox in front of Enable recurring payment options.
As you click on the checkbox, you will see some additional settings appear below.
Here are what each field means:
Plan Name – Here, you will have to enter the title that you want to appear for the subscription, such as “Donation to The Old Age Home”. It will show within the Stripe transaction.
Recurring Period – Here, you can choose the recurring payments time (Daily, Weekly, Monthly, Quarterly, Half-Yearly, or Yearly.)
Customer Email – Select an email field from your form where clients can be contacted.
Setup the Condition for the Payments
The Stripe Addon allows you to set up conditional logic in your form. Using this feature, you can create forms that automatically change according to the user’s selection.
Following are the cases where you can use conditional logic with Stripe payments:
Allow users to pay through Stripe or PayPal
Making payment optional
Allows users to choose onetime payment of recurring payment option
Let’s see the onetime payment and recurring payment option in action.
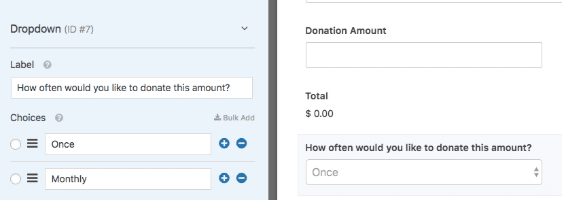
We will create a simple donation form containing dropdown and a multiple choice field. In this form, the user will have the freedom to submit a onetime donation or recurring donation.
We will keep two payment options first onetime payment and second is monthly.
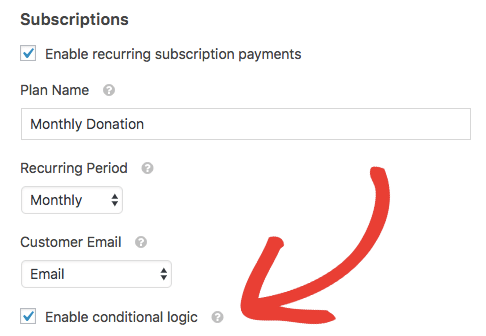
Now, we will get back to Stripe settings and do the basic configuration that we have seen earlier while setting up conditional logic for recurring payments.
To get a monthly recurring donation, we will set up a recurring period monthly. And, then we will click the checkbox labeled Enable conditional logic.
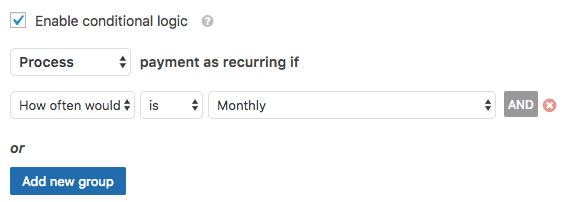
Once you checked the box, additional settings will appear, where you can set conditional logic. For example, we want a donation type monthly.
That’s it your conditional settings is done. Now you are ready to get recurring payment.
Final Thoughts!
I hope now you have understood how WPForms Stripe Addon works to get online payment, donation or order.
Additionally, Stripe Addon allows users to opt onetime payments or recurring payments without leaving your site.
Collecting online payments is quite simple when you have both WPForms and Stripe in your bucket. Let me know if you have a question about WPFroms Stripe Addon in the comment section.
Umesh Singh
Umesh is blogger by heart and digital marketer by profession. He helps small companies to grow their revenue as well as online presence.
Facebook
Twitter
LinkedIn
Pinterest
Subscribe to Stay Updated
You’ll also receive some of our best posts today
Umesh Singh
Umesh is blogger by heart and digital marketer by profession. He helps small companies to grow their revenue as well as online presence.